

Hello lovelies,
I’m so excited to have shared this project with you as a guest designer for Ellen Hutson. If you know me, you know that I love stitching and thread on cards. I was so delighted to try the amazing stitching dies in this new Essentials for Stitching release.
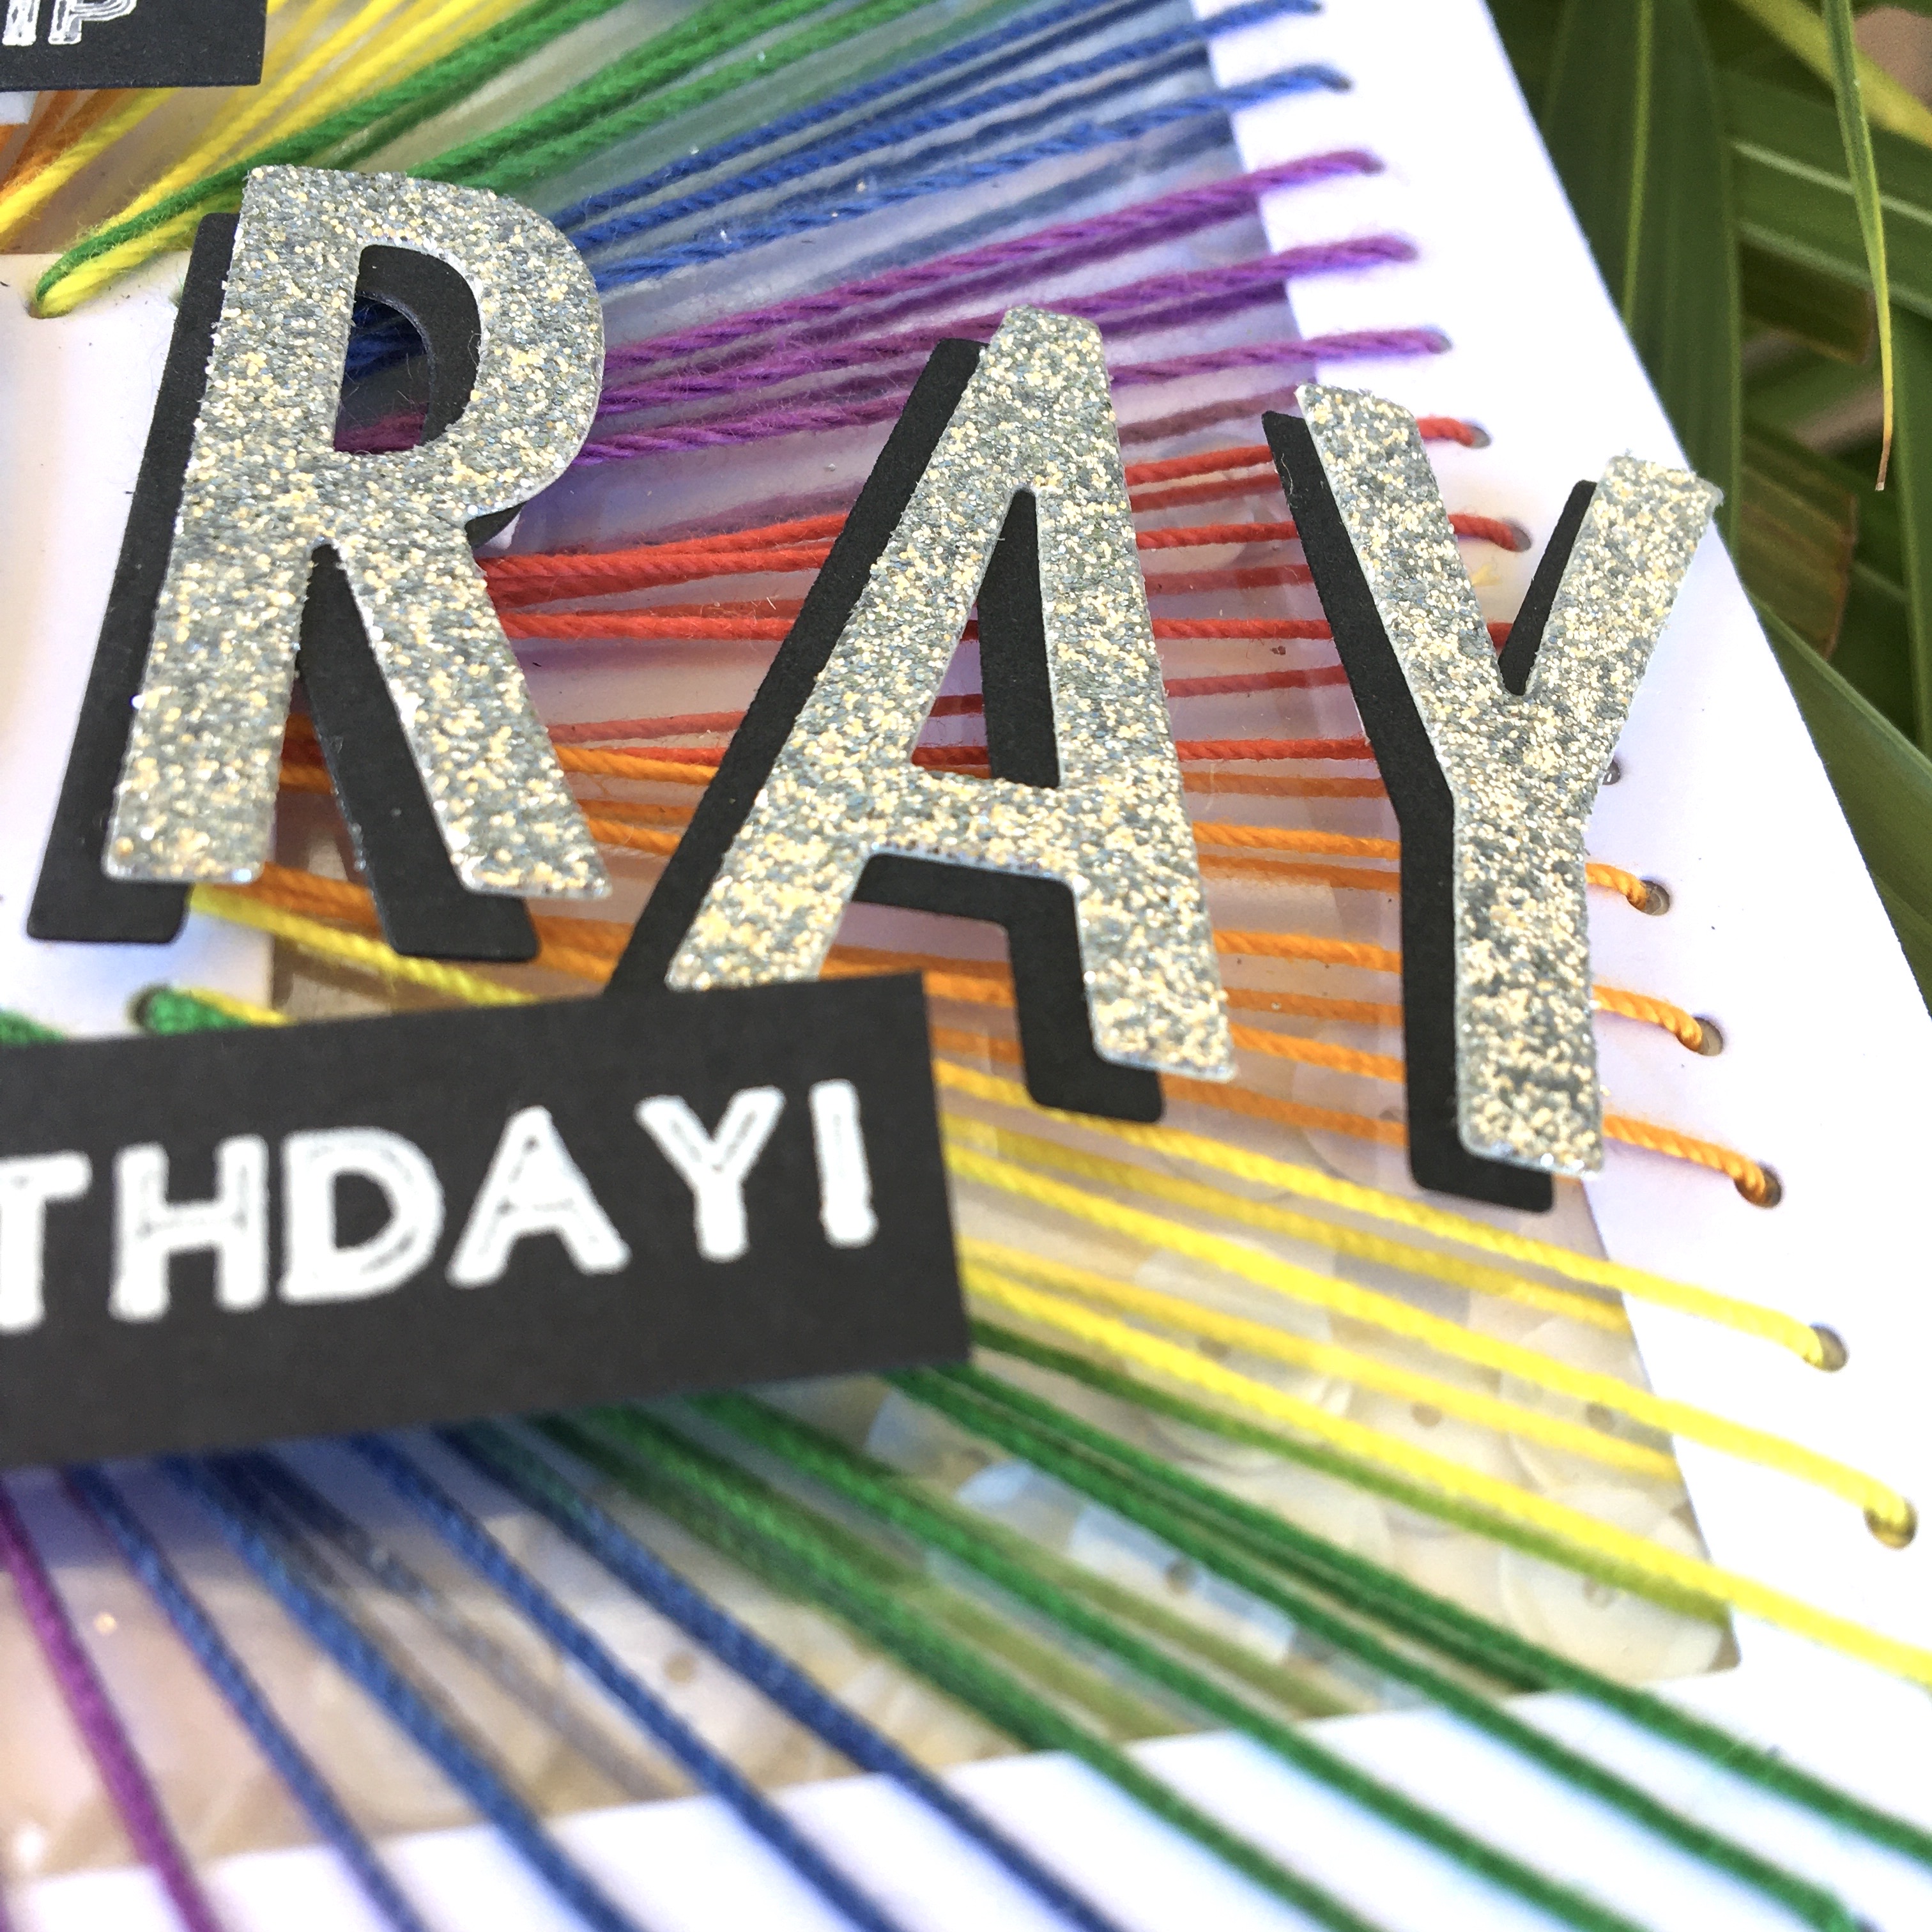
I was walking through the craft aisle of Woolworth and saw the most amazing rainbow colored crochet thread which I immediately purchased. Once I saw these stitching dies I knew I had to use them with this gorgeous thread to make a card.

Here is what you will need:
- Essentials by Ellen Essential Rectangles for Stitching
- Essentials by Ellen Essential Squares
- Essentials by Ellen Essential Squares for Stitching
- Essentials by Ellen Winning Words
- Rainbow crochet thread
- White Cardstock (110 lb)
- Silver glitter cardstock
- Foam tape
- Black cardstock
- An Acetate sheet
- White sequins

Here are the instructions:
- Use the largest die from the Essentials by Ellen Essential Rectangles for Stitching to cut into a 5.5×4.5″ white card base and an acetate base of the same size
- Use the 1.5 inch square die from the Essentials by Ellen Essential Squares to cut a white cardstock square
- Cut the corresponding holes for stitching along the edge of the square using the coordinating stitching die
- Use the same square stitching die to die cut stitching holes into the center of the acetate sheet.
- Glue the white cardstock pieces to the front of the acetate so all stitching holes are aligned
- Thread your needle and place a knot at the end.
- Push your needle (from the back to the front) through any hole at the edge of the square and then through the hole at the corner of rectangular border. Pull thread through until it is taut
- Once the needle is at the back, push it to the front again through the same hole in the square that you just went through. Pull thread through until it is taut
- Once the needle and thread are at the front again, push the needle through the hole just beside the first threaded hole on the rectangle.
- Note – In general each hole in the square will have thread going through it 2-4 times while the holes in the rectangle should have thread going through them once.
- On the long side of the rectangle, use each hole on the square 4 times
- On the short side of the rectangle use each hole on the square 3 times
- Once you have completed sewing secure your thread with packing tape to the back of the square. You can choose to cut a frame to cover the holes at this point if you would like. I like to have the holes showing for this particular card.
- Cut the HOORAY sentiment from silver glitter cardstock and black cardstock. Adhere the glitter cardstock on top of the black with a slight offset so the black appears like a shadow.
- Adhere HOORAY to card front in a curved fashion using foam tape and glue. Glue is needed to ensure that the letters stick to the thread and foam tape is needed for dimension
- Add sentiment strips (white letters on black cardstock, printed or embossed) or use a white gelly roll pen as I did to write on your sentiment. Adhere with foam tape and glue.
- Add foam tape to the back of the completed piece all along the border ensuring that there are no gaps
- Lie your card base flat and sprinkle the sequins in the center
- Adhere the card front to the card base ensuring that the edges are in line and properly sealed to prevent sequins from falling out
- Your card is complete!
These dies are great for stitching but they are also very versatile. You can use them to:
- Emboss for a soft background texture
- Add texture and interest to backgrounds with holes
- Create the cutest circle confetti
- Add fringe to your projects
- Create woven backgrounds or mini tapestry with thread/wool (I’m definitely trying this soon)
I know I will be using them for many future projects.
Thank you so much for stopping by to have a look at what you can do with these new Essential Stitching dies. Comment below how you would use these dies in your cardmaking.
