

Hello Lovelies,
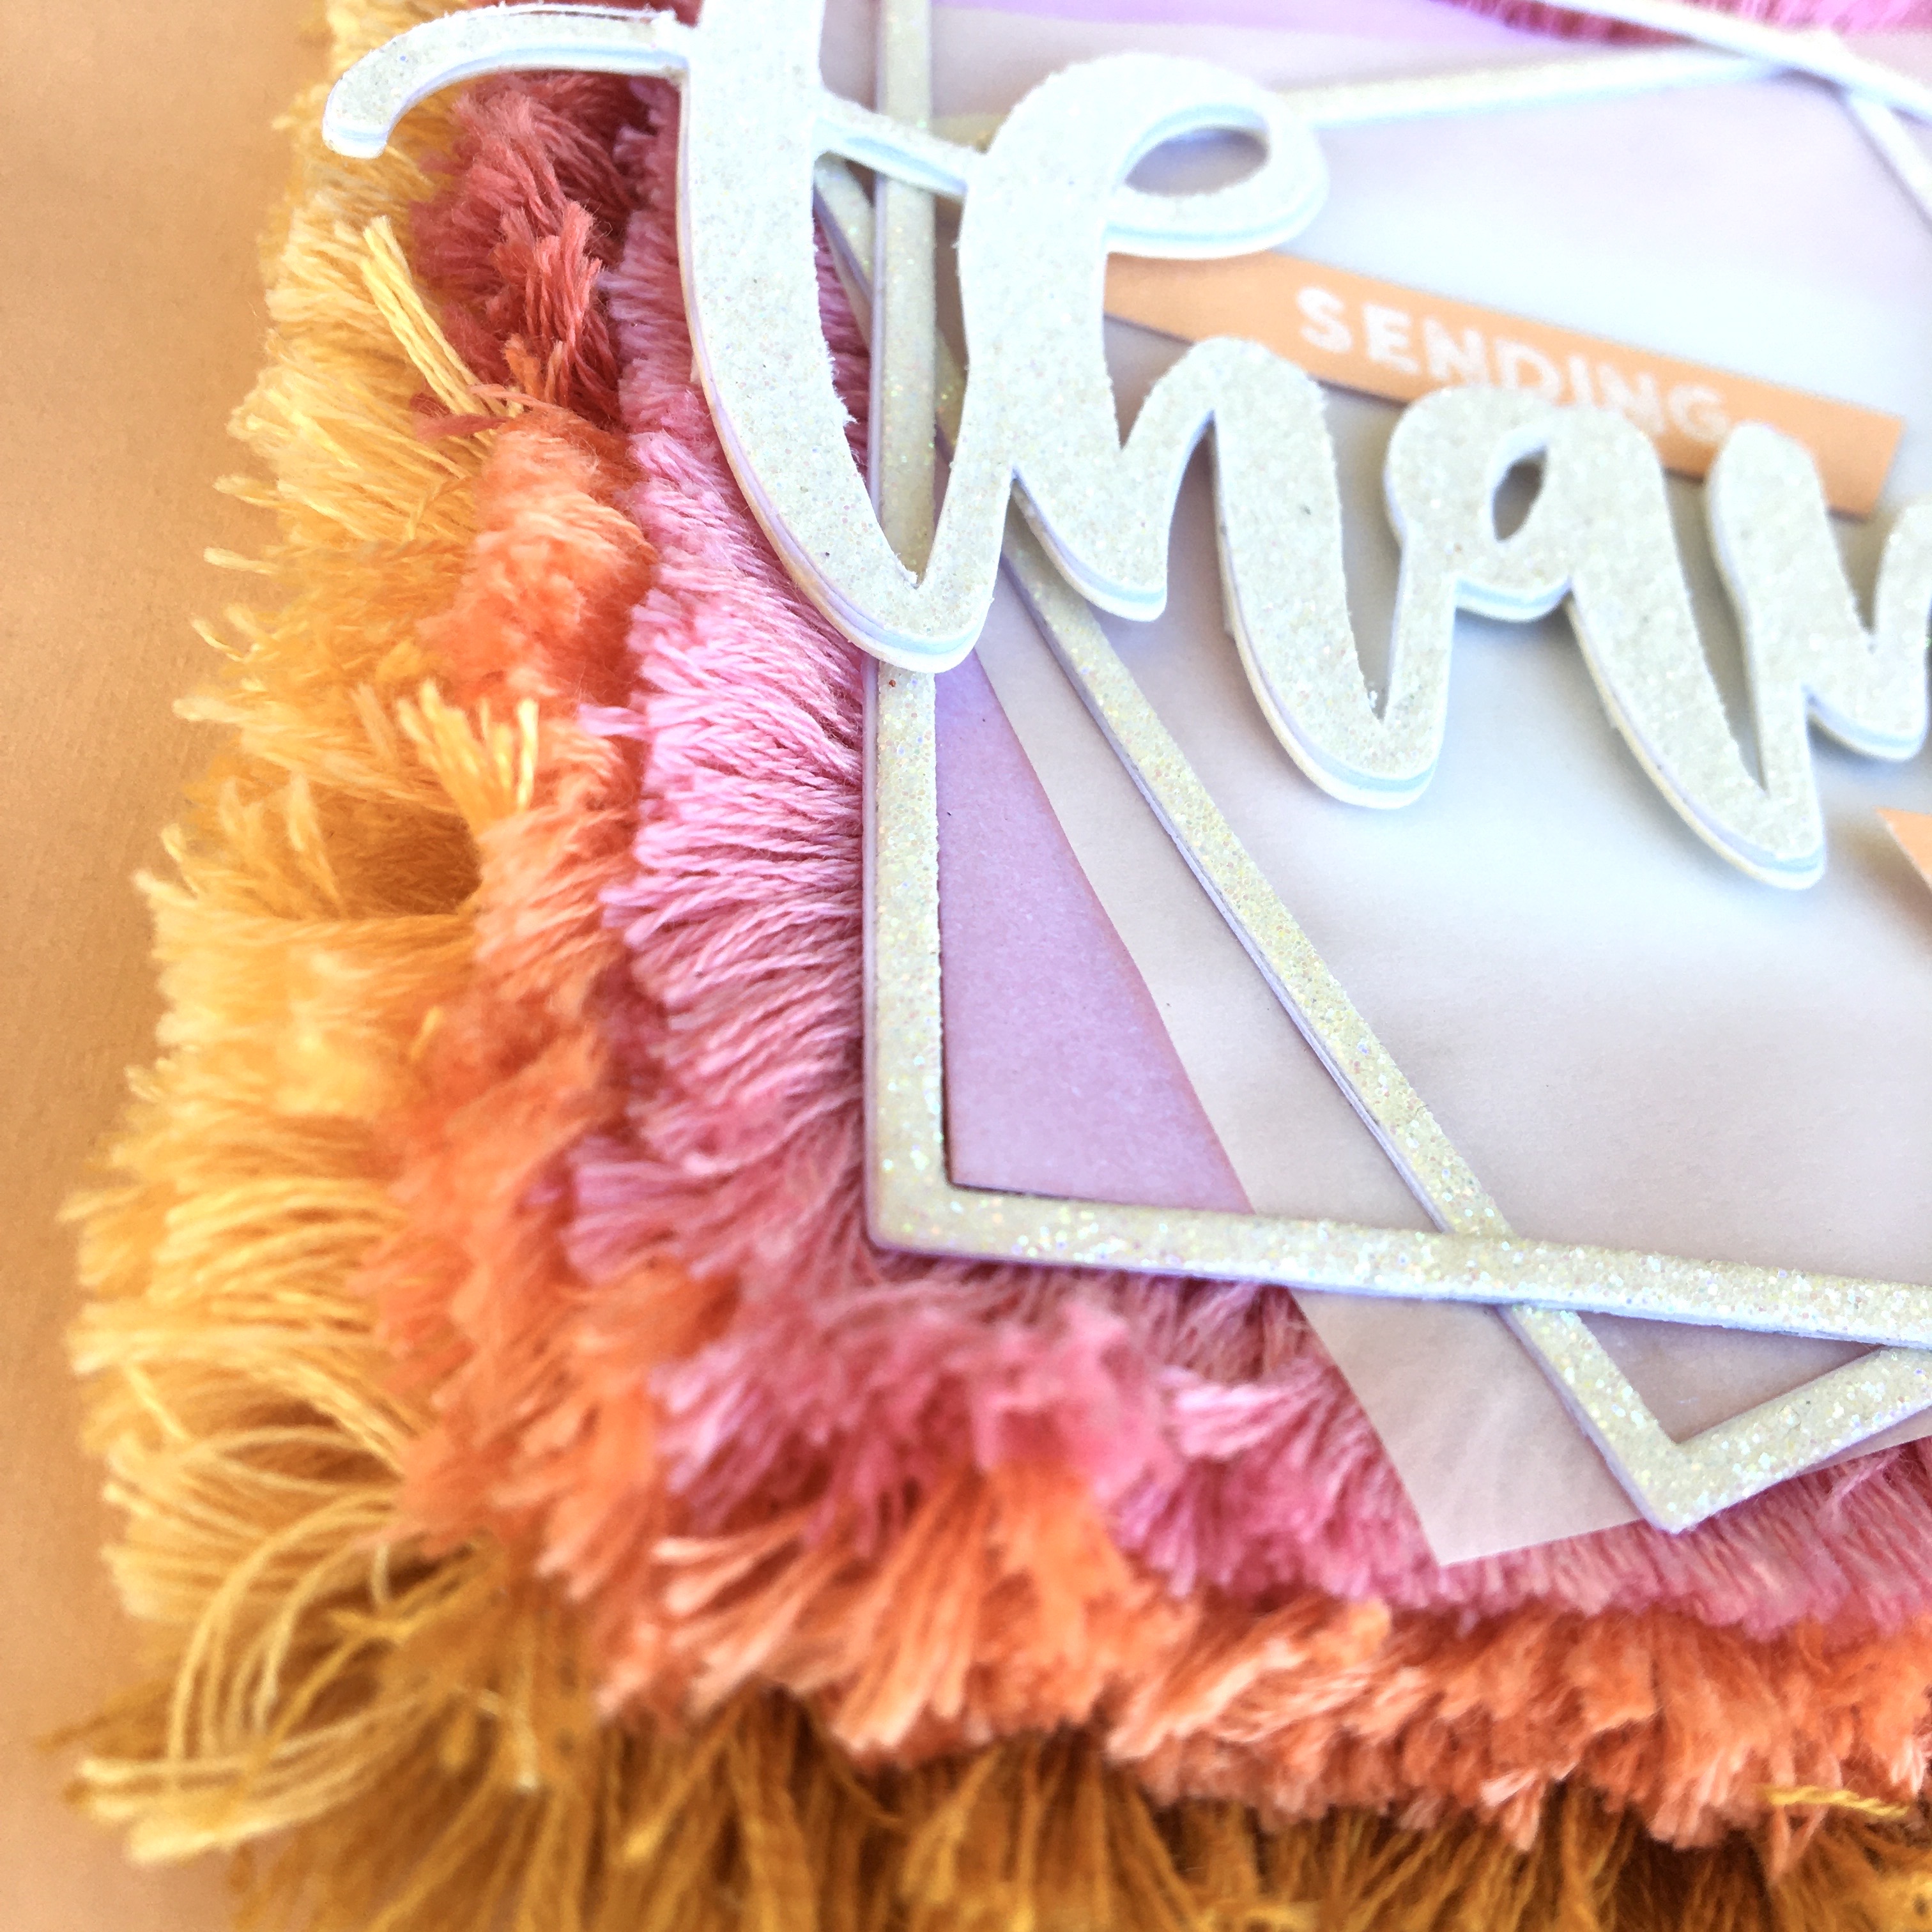
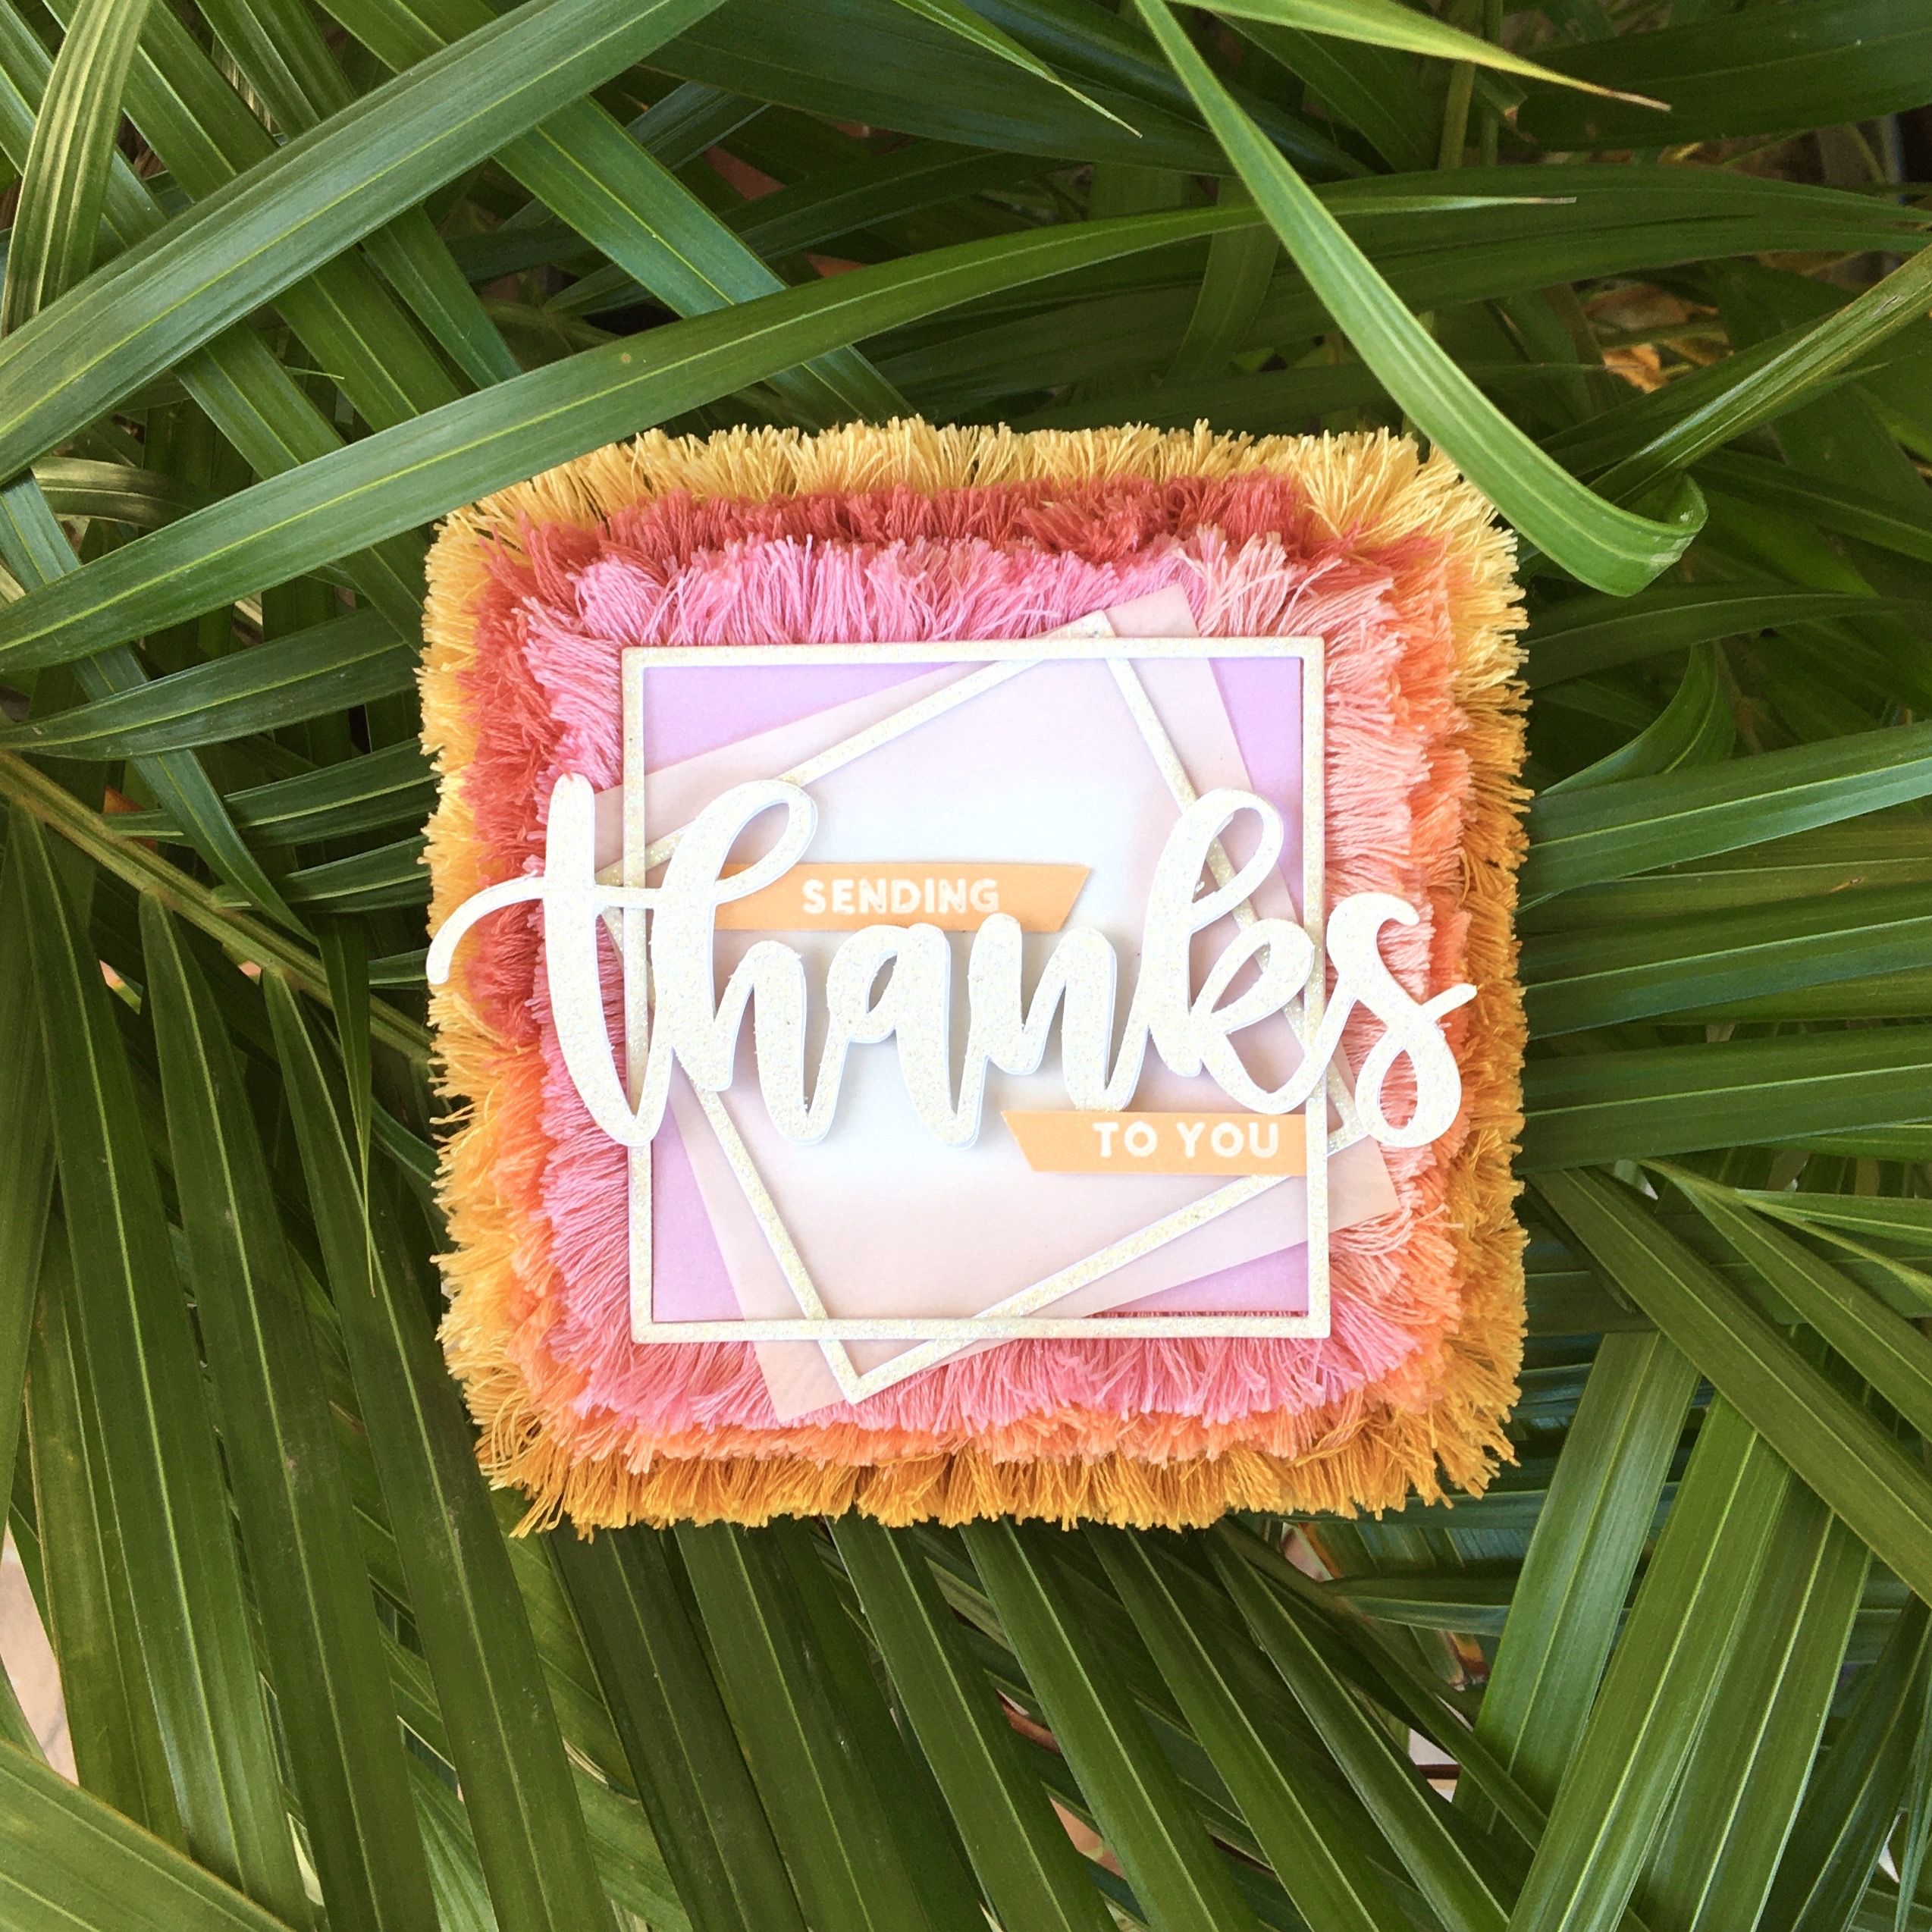
I am so excited to share this project with you as a guest designer for Ellen Hutson. If you know me, you know that I love stitching and thread on cards. I live for loads and loads of texture. I love the feeling of running my fingers over the fibers. So it is no surprise that I am immensely delighted to try the amazing stitching dies in this new release. For months I have been itching to make a fringe card and these dies turned out to be the perfect size holes for the fluffiest fringe. I chose to have fringe around the entire card but you can place the fringe around a sentiment, tag, or focal point if you would like. I officially want to fringe all the things and I have no been able to keep my hands off of this puffy goodness.
Here is what you will need:
- Essentials by Ellen Essential Squares
- Essentials by Ellen Essential squares for stitching
- DMC threads (19, 3341, 604, 783, 761 and 3328)
- a large needle (one that can fit all 6 strands of DMC thread)
- 110lb White cardstock
- an approximately 1/4 inch wooden dowel or pen
- Pink dye ink that matches the pink thread (for blending)
- One sheet of colored cardstock
- One sheet of white glitter cardstock
Here are the instructions:
- Cut some 3, 3.5 and 3.75 inch squares (three of each) from white cardstock using the Essentials by Ellen Essential Squares dies
- Cut corresponding holes into one square of each size using the Essentials by Ellen Essential squares for stitching
- Ink blend the corners of a 3 inch square without holes with a pink dye ink that matches the pink thread being used
- Now the fun begins! Thread your needle with yellow thread. Pull all the way through so that the thread is doubled along its length. Secure to the back of the largest square with holes using packaging tape and push the needle through any hole so that it is to the front of the cardstock.
- Place your wooden dowel along the side of the square. You will be using it to create loops along the length of the cardstock.
- Create a loop by lifting the thread over the dowel to rest towards the back of the cardstock. From this point, push the needle through the hole just below the thread to the front of the cardstock piece.
- Repeat this step to form two loops (i.e. The needle goes through the same hole twice)
- Wrap thread over the dowel a third time but this time push the needle through the hole just adjacent to the loops.
- Repeat steps 6-8 ensuring that there are two loops in every hole.
- When you have finished one side, slide the dowel out and simply rotate the card and repeat steps 5-8
- When you have finished all four corners secure the end of the thread with tape.
- Repeat steps 4-9 for the 3.5 inch square with holes (for which I used peach and red thread) and for the 3 inch square with holes (for which I used pink thread)
- Once all loops are complete use a strong wet adhesive (I used silicone glue) to adhere the two unpierced squares to the back and front of the stitched piece for each size square. The idea is to prevent the fringe from moving so ensure that all the holes on each side of the squares are partially covered and make sure you place glue to the edge of the squares to ensure it comes in contact with the thread.
- Glue pink blended piece to the front of the smallest square.
- Once glue has dried, slide your scissors through the loops and cut them to create the fringe.
- Use a small comb to separate the fringe well and trim the uneven edges using a guillotine paper trimmer so the lines are straight.
- Adhere the trimmed pieces to each other using glue by stacking from largest to smallest.
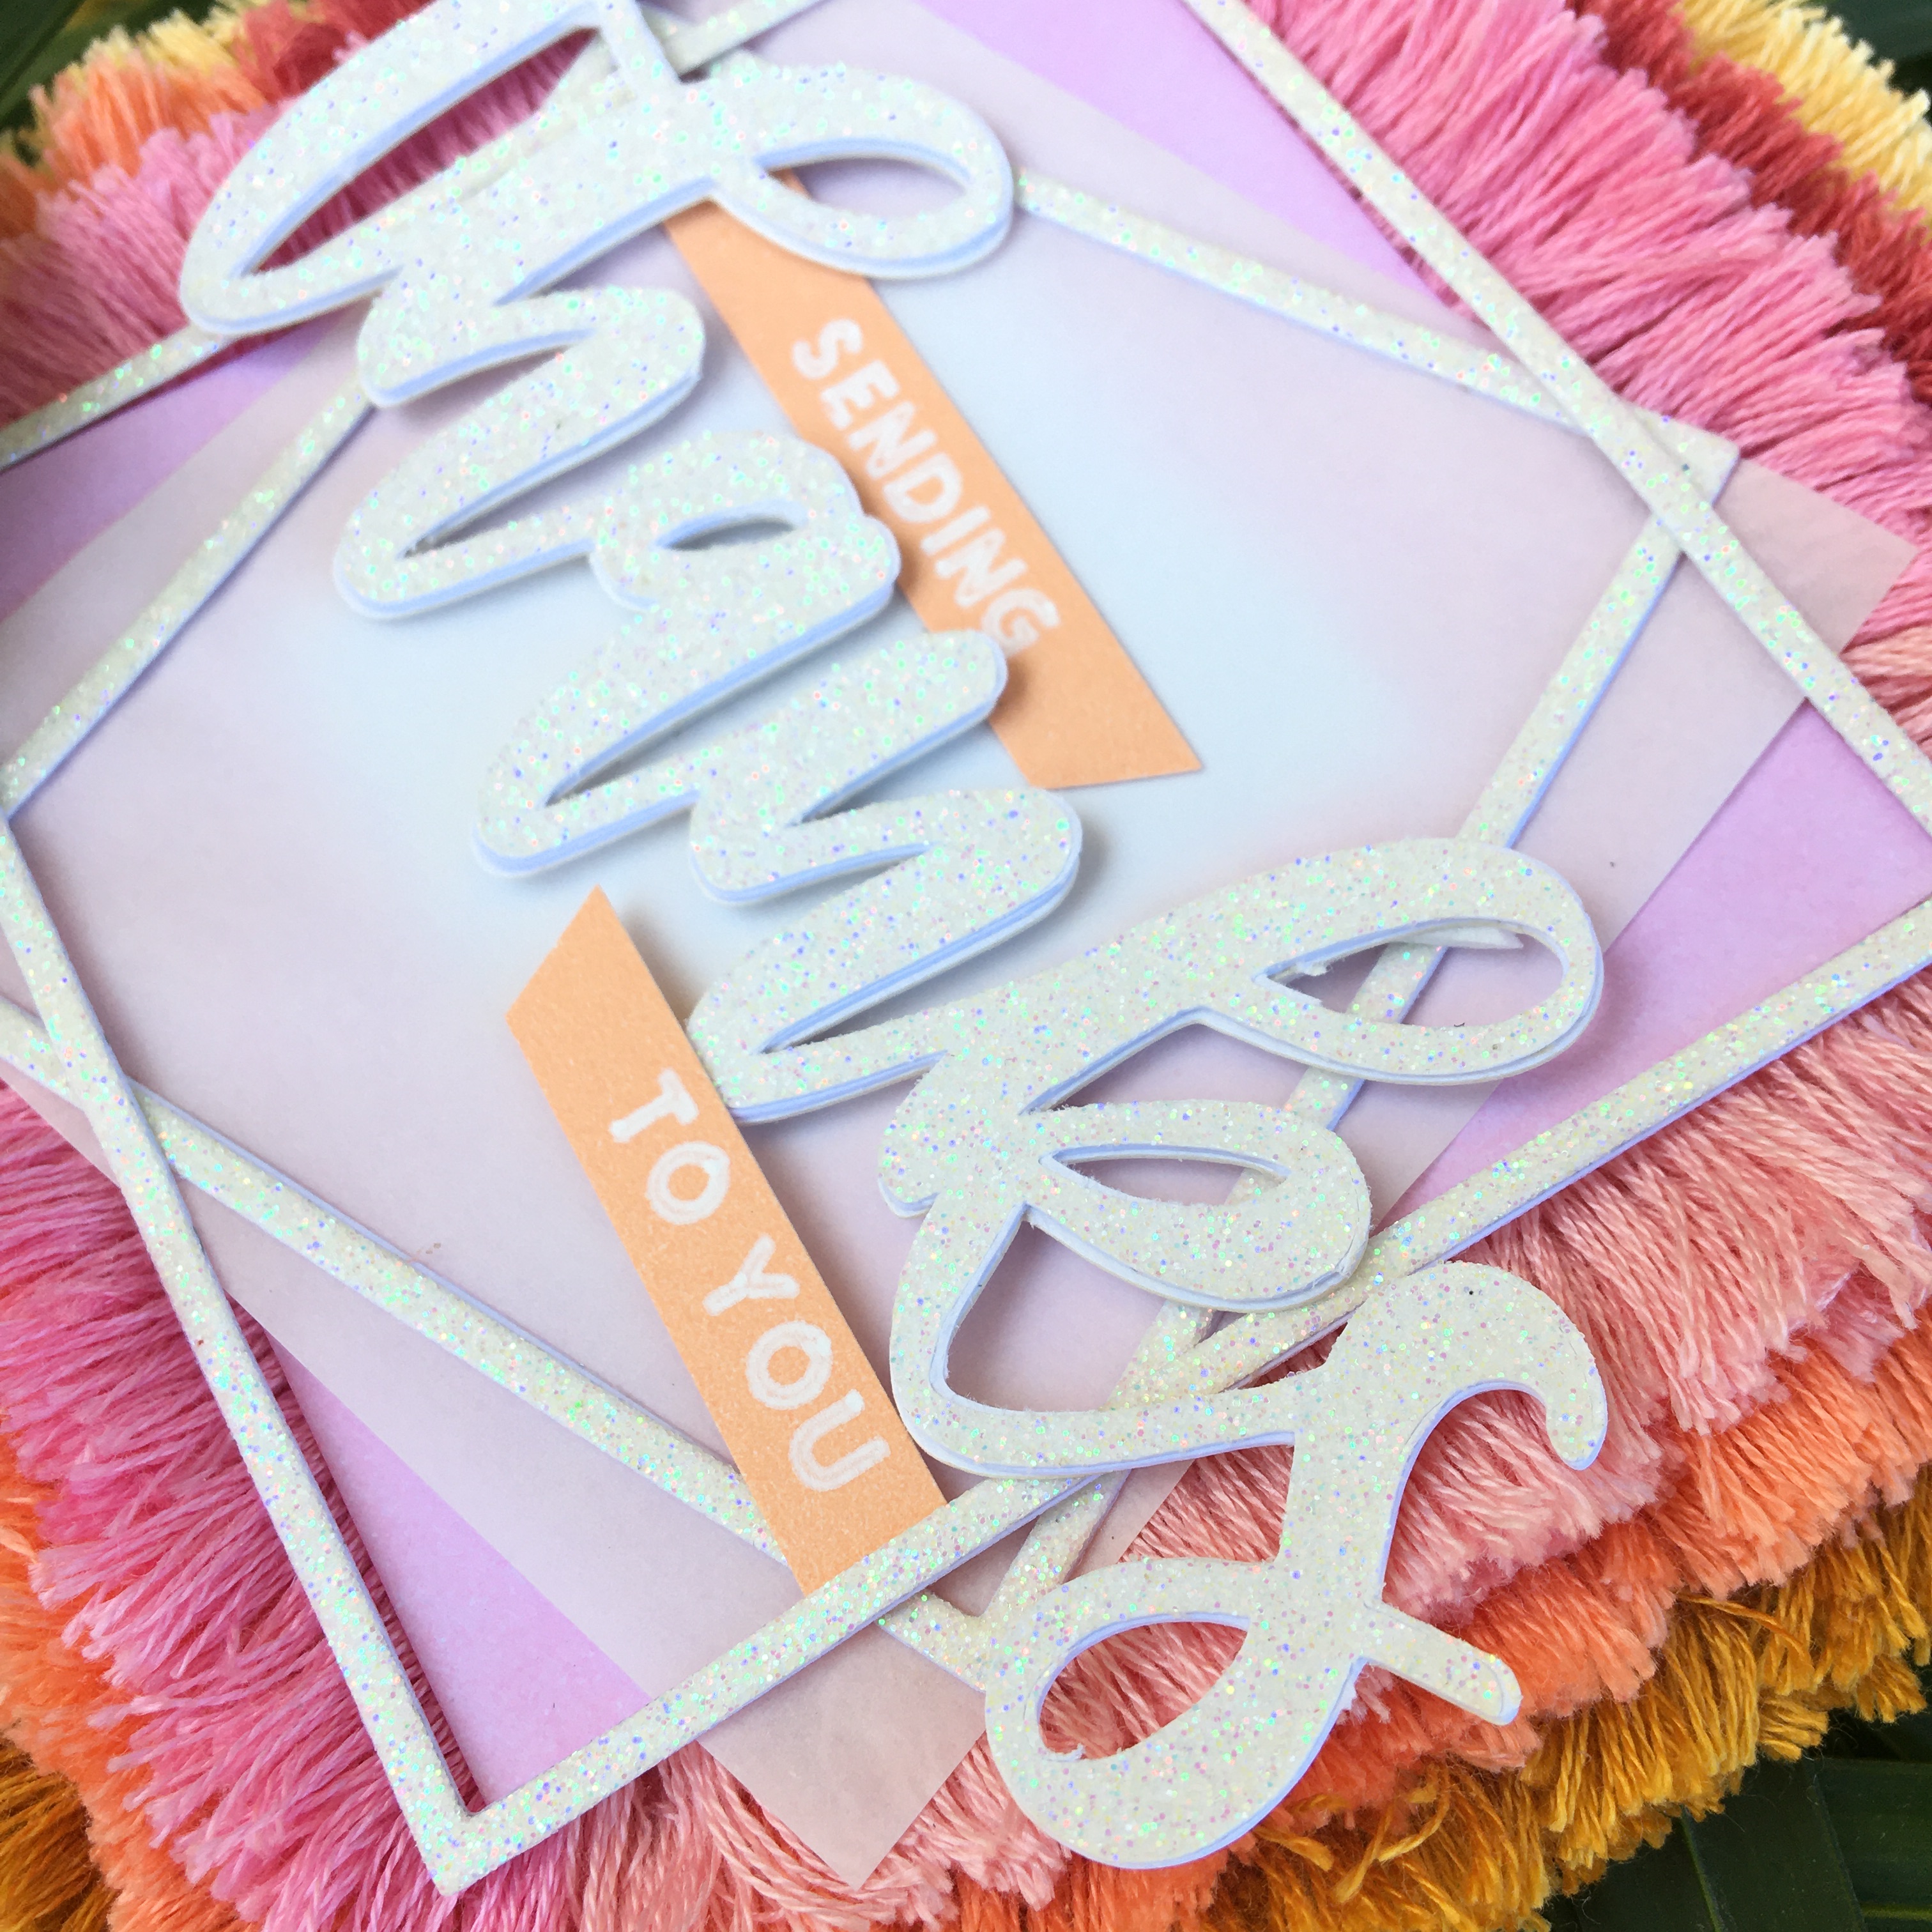
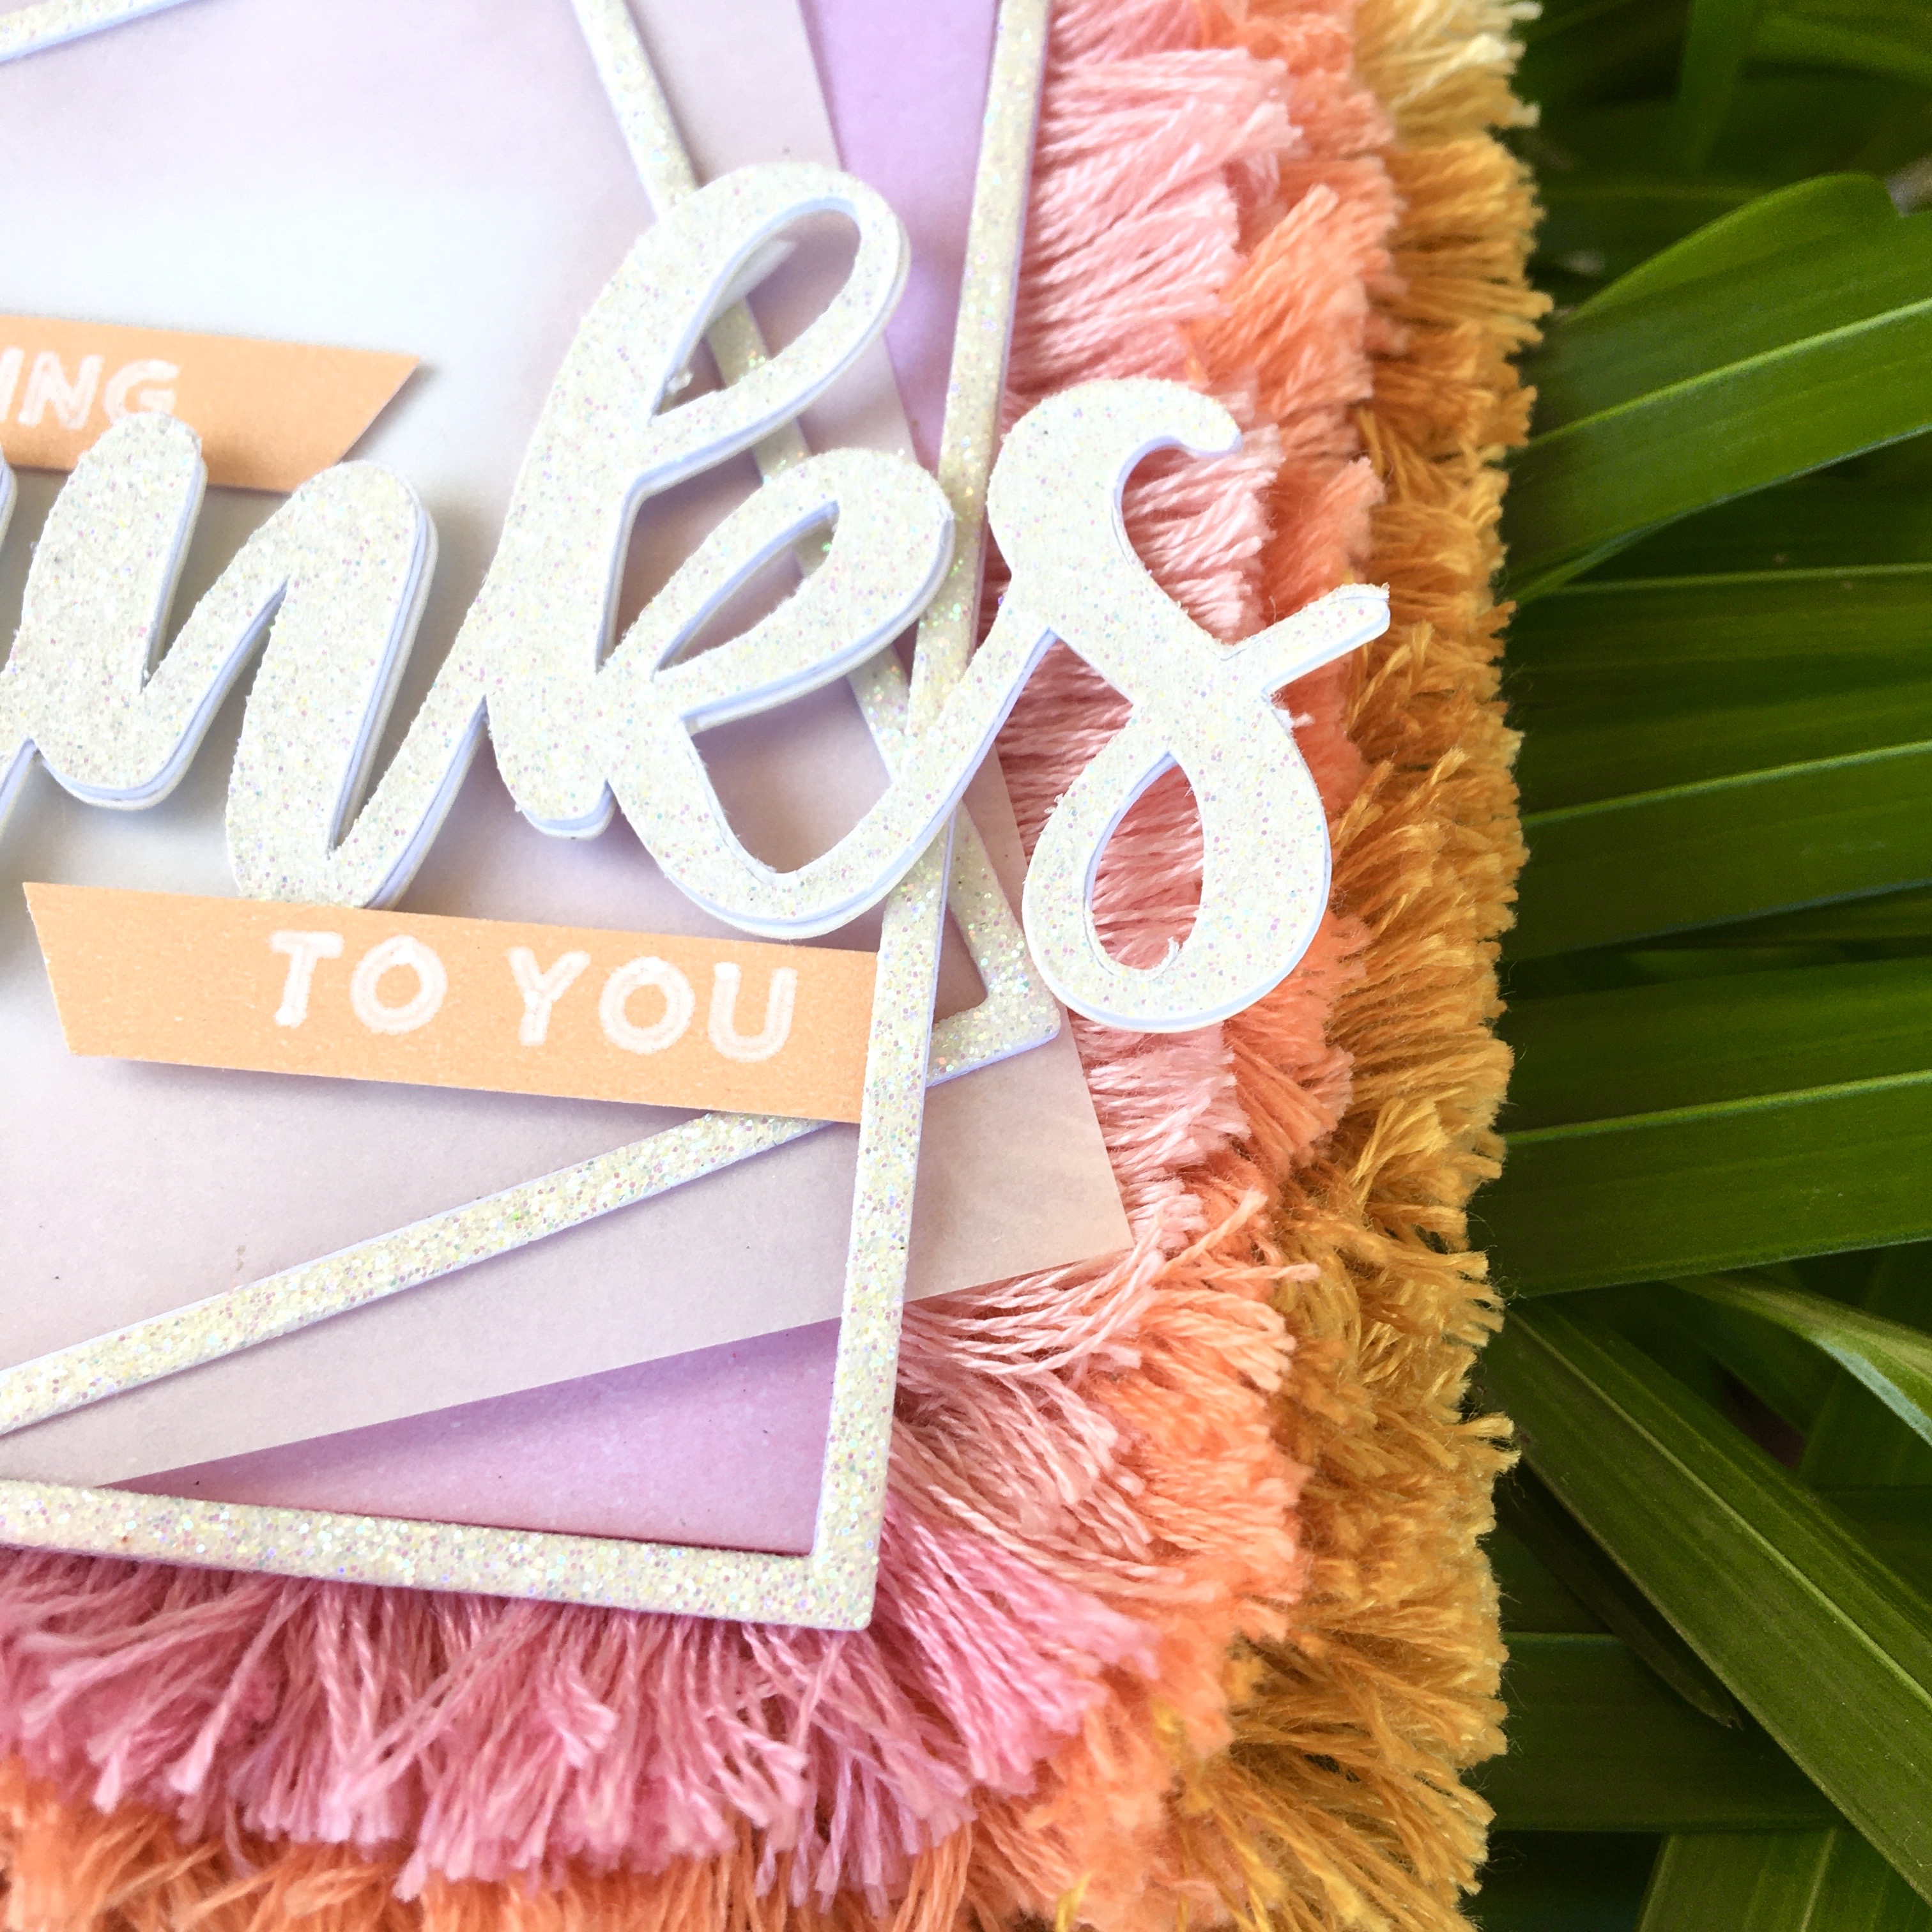
- Cut two 2.5 inch and a 3 inch frame from white glitter cardstock and white cardstock using the Essentials by Ellen Essential Squares dies. Glue the glitter pieces on to the white cardstock to add strength and dimension
- Cut your sentiment from twice from white glitter cardstock and white cardstock. Glue the glitter pieces on to the white cardstock to add strength and dimension
- Cut a 3 inch vellum square using the Essentials by Ellen Essential Squares
- Adhere the frames with glue and the sentiment with foam tape to the vellum
- Add a stamped sentiment strip in a coordinating cardstock color
- Your card is complete!
You can see all this steps in the video below.
I hope you will use these dies to add some texture to your cards. Thank you so much for stopping by.
